

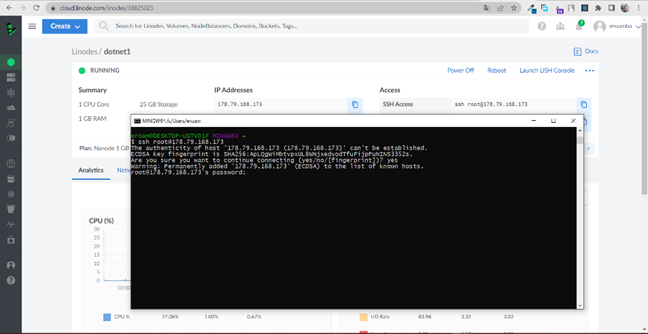
Avant de commencer nous nous connectons sur la plateforme Linode sur notre VPS linux(Ubuntu).
Si vous voulez savoir comment accéder à un VPS sur Linode suivez cet article. Connectons-nous par SSH à notre machine Ubuntu sur linode. Rappelons que les prix sur Linode sont vraiment accessibles et abordables.
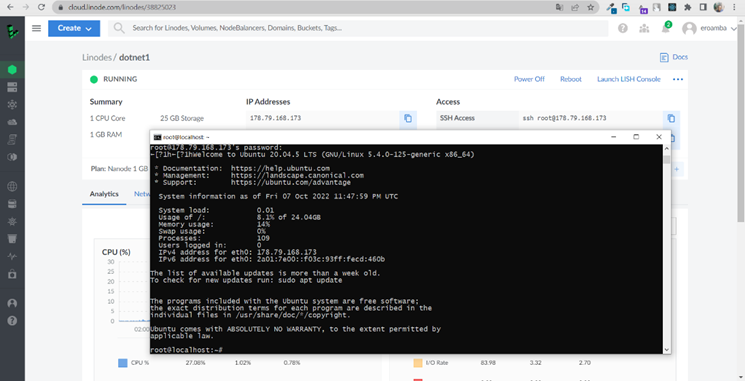
Configuration de base Linux sur Linode.
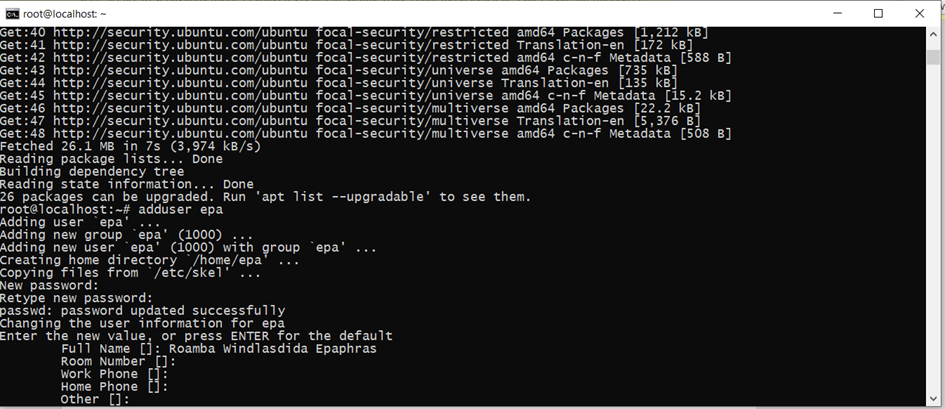
root@localhost:~# sudo apt update
Création d’un nouvel Utilisateur
root@localhost:~# adduser epa
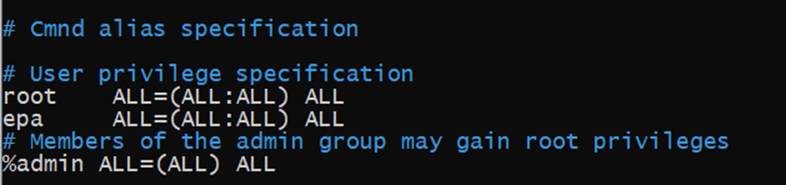
Accordons les privilège à l’utilisateur
root@localhost:~# usermod -aG sudo epa
Spécifions les privilèges de l’utilisateur en ajoutant le nom de notre utilisateur et les accès ALL=(ALL: ALL) ALL dans le fichier qui s’ouvrira
root@localhost:~# visudo
Changeons d'utilisateur maintenant.
root@localhost:~# su - epa
Installons dotnet sur notre machine linux(Ubuntu 20.04).
epa@localhost:~# wget https://packages.microsoft.com/config/ubuntu/20.04/packages-microsoft-prod.deb -O packages-microsoft-prod.deb
epa@localhost:~# sudo dpkg -i packages-microsoft-prod.deb
epa@localhost:~# sudo apt update
epa@localhost:~# sudo apt install apt-transport-https
epa@localhost:~# sudo apt-get install -y dotnet-sdk-5.0
epa@localhost:~# dotnet --list-sdks

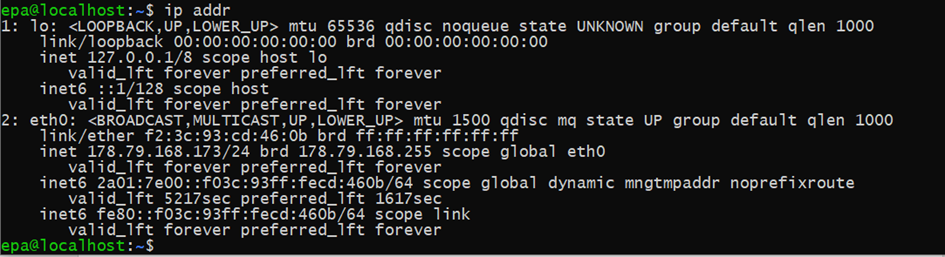
Recherchons l’adresse IP de notre machine afin de l’ajouter à notre projet .net .
Configuration de notre projet dotnet en environnement de développement
Dans le fichier Program.cs ajoutons l’adresse IP de notre machine Ubuntu en ligne
public static IHostBuilder CreateHostBuilder(string[] args) =>Host.CreateDefaultBuilder(args).ConfigureWebHostDefaults(webBuilder =>{webBuilder.UseStartup<Startup>().UseUrls("http://178.79.168.173:5000;http://178.79.168.173:5002");// webBuilder.UseStartup<Startup>().UseUrls("http://localhost:5000");});
Après nous faisons un build du projet du projet .Net
D:\PROJET\BACK DOTNET\CHRETIEN 2\CHRETIEN2> dotnet build
Créons un dossier qui contiendra notre build du projet dotnet sur notre machine linux
epa@localhost:~$ mkdir chretien
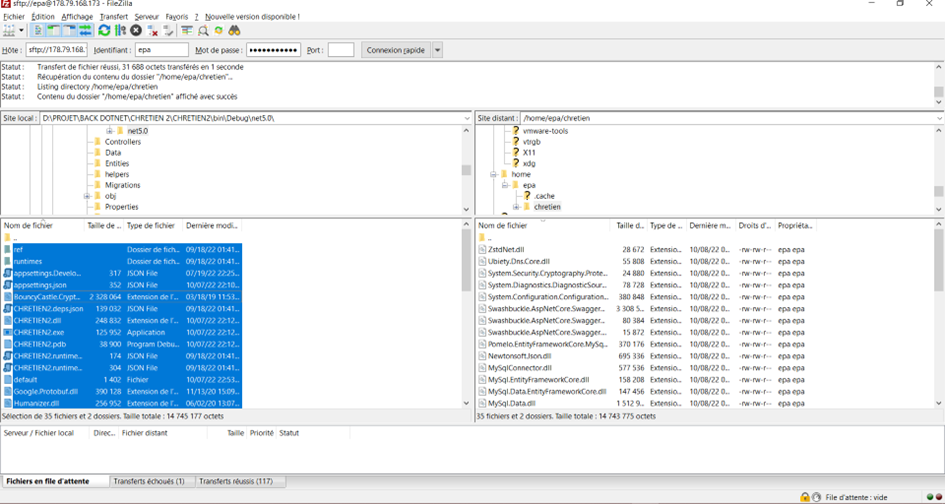
Utilisons FileZilla pour récupérer notre projet sur notre serveur Linode Ubuntu en ligne. Utilisons la connexion FTP avec le port 22
Configuration notre serveur Nginx sur Linux (Ubuntu)
Installons Nginx sur Linux
epa@localhost:~$ sudo apt install nginx
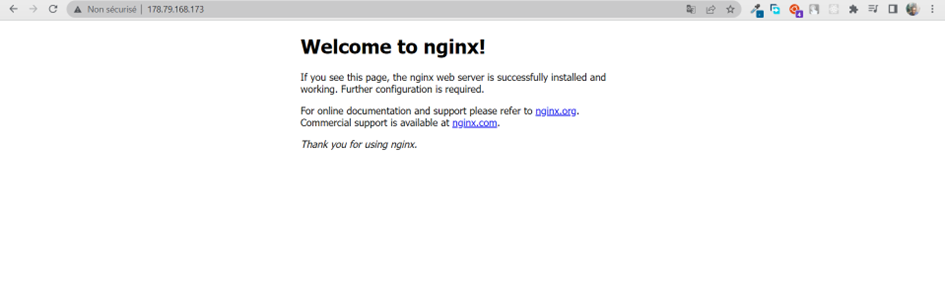
Nous avons Nginx qui est bien installé super
Passons à la configuration de Nginx en production
Utilisons nano ou Vim pour configurer nginx
epa@localhost:~$ sudo vim /etc/nginx/sites-available/default
server {
listen 80;
location / {
proxy_pass            http://178.79.168.173:5002;
proxy_http_version 1.1;
proxy_set_header   Upgrade $http_upgrade;
proxy_set_header   Connection keep-alive;
proxy_set_header   Host $host;
proxy_cache_bypass $http_upgrade;
proxy_set_header   X-Forwarded-For $proxy_add_x_forwarded_for;
proxy_set_header   X-Forwarded-Proto $scheme;
}
}
Vérifions si notre configuration est ok.
epa@localhost:~$ sudo nginx -t

epa@localhost:~$ sudo systemctl restart nginx
Oups j’oublias activons nos ports avec UFW pour la gestion des pares-feux.
Si tu veux mieux comprendre UFW je t’explique dans ce lien
epa@localhost:~$ sudo ufw enable
epa@localhost:~$ sudo ufw allow ssh
sudo ufw allow 80/tcp
sudo ufw allow 5000/tcp
sudo ufw allow 5002/tcp
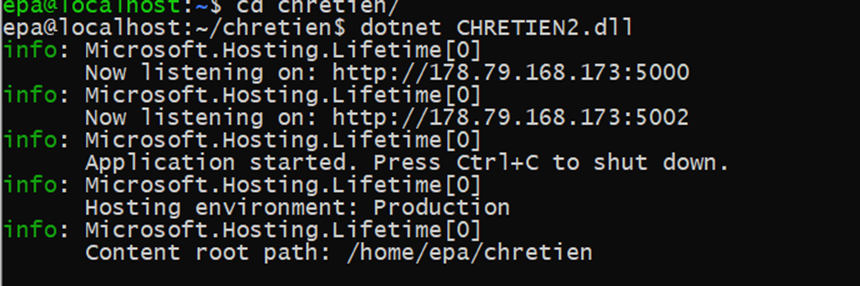
epa@localhost:~$ cd chretien/
Lançons le projet et testons si ça fonctionne
epa@localhost:~/chretien$ dotnet CHRETIEN2.dll
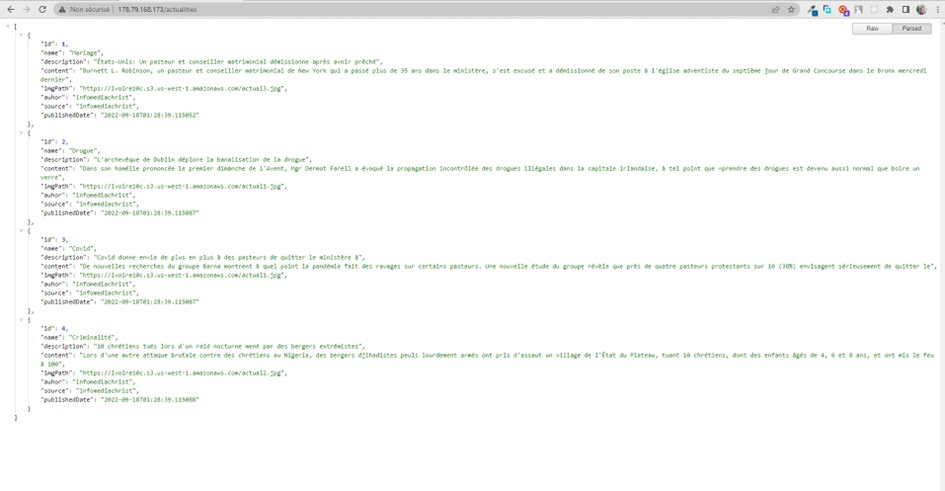
Testons notre api avec ce endpoint : http://178.79.168.173/actualities ou http://178.79.168.173:5000/actualities ou http://178.79.168.173:5002/actualities dans notre navigateur
Super notre configuration marche bien essayons maintenant d’améliorer notre déploiement .net sur linux avec un nom de domaine tout en ajoutant un certificat SSL valide pour activer HTTPS.